Monday, December 27, 2010
TAST 2010 - WEEKS 38 - 44
Thursday, November 04, 2010
TAST 2010 - TURKMAN STITCH
Monday, September 27, 2010
TAST 2010 - EASTERN STITCH
Tuesday, August 10, 2010
TAST 2010 - TRIPLE & WAVED CHAINS
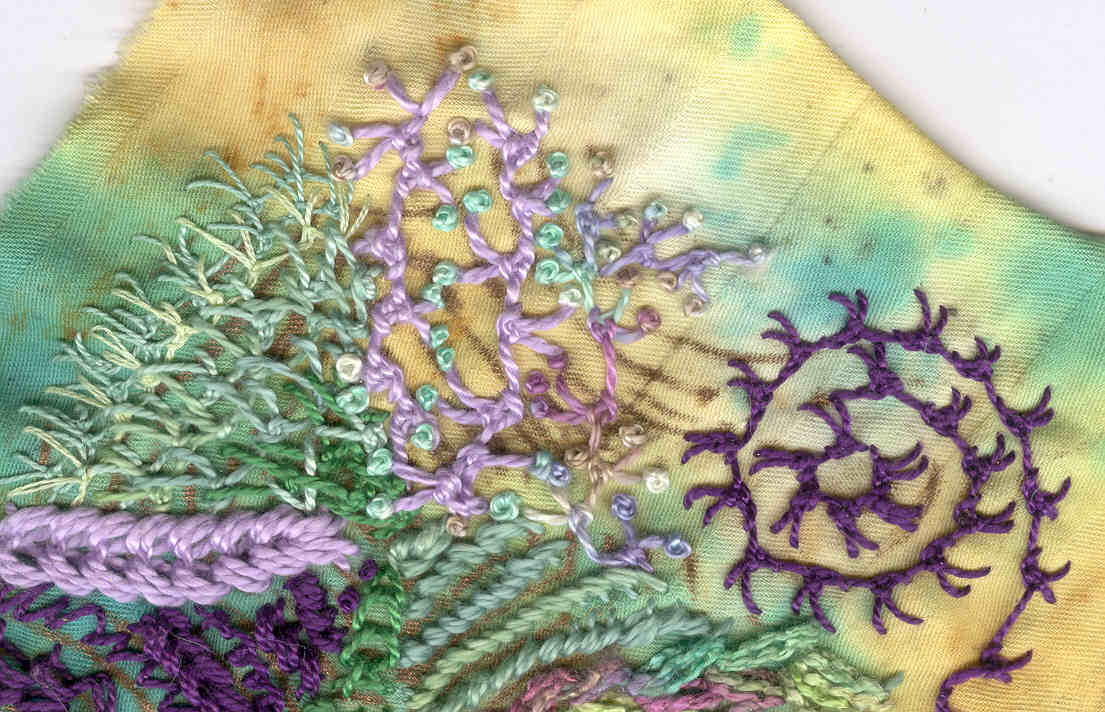
Weeks 22 and 23 of Take a Stitch Tuesday - chain stitch variations. Not much to say here; the stitches were easy to work and and afforded some interesting possibilities for change. With the triple chain I played with the orientation of the side chains and then placed the triads in different arrangements. The zig-zag one doesn't show up well; I should have used two strands of floss to stand up to the #5 perle. I worked this pattern using two needles.
The wreath is made from two different variegated green threads, but I did not work the leaves in pairs. I worked stitches in one color first and then filled in with the other. The two vertical lengths of waved chain are similar and used the same double strands of floss. In the skinnier one I work each bottom stitch through the same hole.
A word to thank all of you who read my blog and take time to leave much appreciated comments. I am not ignoring you! I do love to look at your work and leave feedback and hope to resume that practice again.
Friday, May 28, 2010
TAST 2010 - RAISED CUP STITCH
I finished Week 12 early, so I was happy to keep my fingers from wriggling in anticipation of Monday Night and the latest TAST temptation. I worried (not really, this was a rag!) about embroidery needles and sharp points catching on tiny, terry loops, but since the velour finish had long ago worn away from the printed front side, the fabric was very giving and yielded to my large tapestry/yarn needles with ease. For this sampler I ended up using only #5 perle cottons and fingering weight wool/silk yarns.
About 2/3's down I started a line of twisted chain. I wanted a little more height so I layered a second row right on top. You can see I got much better dimension with yarn seen in the single layer of twisted chain below (brown). The gray line is knotted buttonhole stitch threaded with a piece shiny raffia, probably something that once tied up a package. Seems like I had just gotten down that charcoal line of Sorbello than twas time to download Week 13, Raised Cup Stitch! Am I the only one who has a pavlovian response to Sharon B's challenge posts?
I got all of those raised cups stitched waiting in a doctor's office for DH. They are all worked with the silk & wool yarns. I love their organic shapes, how they flop and smoosh together. The white one in the center is an example of decreasing to make the cup turn inward. The coppery bit you see are "stamens" emanating from a French knot. I added irregular cretan stitching awaiting DH's lab work the next day, routine medical, btw. I was satisfied that that finished the upper portion, but had to experiment a bit to get the rest as you see below.
Thursday, May 20, 2010
TAST 2010 - SORBELLO
Sunday, May 16, 2010
TAST 2010: BULLION BUTTONHOLE
Saturday, May 08, 2010
TAST 2010 - CLOUD FILLING

I really liked the way Row 1 turned out. I made the foundation bars with two side by side stitches, but because of the looseness and irregularity of the background weave it looks like I stitched little v's. For the first layer of lacing I used #5 perle in yellow, and because it doesn't stand out on its own, I added a second layer by lacing through the center bars only and going under the background thread directly below the top bars and above the bottom bars. The result is like a row of spiders, and I think I'm going to have to file this idea away for a future CQ or Halloween project. The detail to the right shows how I vertically worked this next segment . Obviously it was a waste of time because the stitching looks the same on its side! Two strands of metallic floss were used for lacing. The sparkle seems to have gotten lost. Below left is a closeup of the
lace yarn I used. If I pulled it taut I would just have a line of navy; however, the looseness and ease of the yarn made it possible for me to pouf it out. If this section looks uneven, it is. I laid out the foundation bars in a gentle wave. The the rows of stitching are parallel, so the lacing follows the undulation. A less bulky yarn would have shown this better. The fourth segment is an experiment that didn't work for me here with my choice of lacing yarn, a tweed, cabled cotton in a heavy worsted weight. My plan began with the base of detached chains with the tack-down stitches pointing inwards to accomodate a second lacing. Nothing I had on hand provided enough contrast, so I left it bare, and although it begs for further embellishment in the center, you can see the design I was going for with the graduated spacing of upper and bottom chain stitches. Here the center anchors are beads which stay in a straight line unlike the beads in the previous section which parallel the top and bottom rows.Monday, May 03, 2010
TAST 2010 - RAISED HERRINGBONE BAND
For these weekly studies I rarely plan a design first. If the stitch is new to me, I practice the basics on a doodlecloth . When I can grasp the mechanics of the stitch, I don my thinking cap then may or may not scribble down the variations I come up with. From this point I pretty much work spontaneously, although I do strive for a reasonably balanced composition. I'm no stranger to the frog pond. Sometimes experiments fail or need to be further modified.I encourage readers to discover how other participants explore the TAST2010 stitches. Please visit our Flickr group site.
Saturday, April 24, 2010
TAST 2010 - FANCY HEM STITCH
WEEK 8 - FANCY HEM STITCH
This stitch was easy to work and offers endless possibilities for variance and additional embellishment like weaving or beading. For this sampler I let the lines of stitches stand on their own, as I wanted the colorplay to be evident.
The background is another swatch of hand dyed cotton. The color is a yellow orange with mottles of burnt orange. The threads are all DMC #5 perle, except for the variegated ones which are Caron's Watercolors.
Mostly I experimented with stitch size and number of wraps. Here's what I did starting from the top:
Row 1 - Smaller stitches, with foundation lines close together with maximum wraps around the bars.
Row 2 - Same as first row except fewer wraps. I discovered with stitches this small I was able to keep the wrap thread entirely on the surface.
Row 3 - Slightly larger length and distance between foundation stitching. With moderate number of wraps the diamond and "x" are apparent, offering perfect placement for beads.
Row 4 - Stitches are the same length as 3, but foundation lines are further apart and wraps are limited to 2.
Row 5 - Here I laid down 3 foundation lines not too far apart. I alternated lines wrapped in each stitch; ie, wrapped lines 1 and 2 the first half of the stitch, then switched to wrapping 2 and 3. Alternating wraps opens the possibility for additional patterning. I worked mine to form a zigzag.
Row 6 - Varying the height of each stitch. I imagine this could be worked with greater irregularity for an abstract or distorted look. To keep wrap tension even I was limited to the number of wraps per stitch. I realized a problem when I had finished; some of the threads coming and going from the cloth beneath the wraps show. I'm thinking about ways the larger stitches could be embellished. An "X" over the wraps, partially wrapping or faux wrapping the wraps, lacing different fibers or ribbon are some of my ideas.
Rows 7 & 8 - Show the stitch can handle at least a gentle curve.
I have not stitched the sampler onto the sangria fabric, and the knotted snippets are not attached. I just laid them there for effect.
You can see samplers from other TAST participants (at least 200 from all over the world) at the group Flickr site.
Tuesday, April 20, 2010
TAST 2010 - ROPE STITCH
ROPE STITCH - Week 7 of Take a Stitch Tuesday 2010. It took me a couple of days to figure out this stitch. It's not difficult, but I often have trouble when orienting thread under needle. Remember I'm the one that has yet to master the very basic picot stitch in Hardanger. Hopefully you can see my progress.
The background for the stitches is a scrap of hand dyed Aida cloth. I worked all of the columns from the top and began on the left. The first two columns are #5 pearl; the only difference is the number of threads. Boy, the picture sure shows up the inconsistencies, and YIKES!, I moved over a thread about half way down . Column 3 was loosely stitched with a strand of Caron Watercolours. It looks sloppy. I think the reason it's uneven in places is that when I tried to take out a stitch or two it was it was
hard to pick up again. I finally got the hang of it toward the end.
Column 4, I made the coils closer together, and it looks neater. I had no difficulty creating the circle. Column 5
looks like a whole 'nother stitch. For this I made the coils right up against each other. It's like satin stitch with more dimension. Column 6 was worked with silk and wool fingering yarn, and it behaved beautifully. Not so with the slippery rayon thread I used for the first layer of Column 7. I stitched a second layer with the Watercolours, staggering the start.
Notice anything different about Column 8? Nothing remarkable except I worked this and the remaining rows in the opposite direction. See how the coils slant in a different angle?
I stitched the little sampler onto a piece of batik, the colors of which remind me of sangria. From here on this becomes a work in progress. I'll likely play with more buttons and threads.
P.S. In response to Connie's remark that I may be too self-critical, I have to say I do try to be objective. This is a case where the sampler doesn't look that bad in the fabric, but I confess to shock when I saw it enlarged on the screen. Every flaw (just spotted another, but I'm not talkin') seemed to fly in my face. My posts usually detail my personal learning process of which self evaluation is an important part. When I make mistakes, I share them. I suck up the embarassment and remind myself that some muse wants me to learn by trial and error, to keep myself honest, and ego in check by experiencing creative lessons in humility. :-)
Sunday, April 11, 2010
TAST 2010: BUTTONHOLE EYELET FLOWER
I haven't viewed any of the other samples from the group, but I suspect my flowers may appear a bit different. They certainly don't resemble anything close to Sharon B's prototype. Still it was a good experience for me, always nice to add a flower to the stitching repetoire, and it did force me to practice multiple bullions.
The background is hand dyed silk from Vicki Clayton. I began with the red petalled flower. Um, the flower was supposed to have only five petals, but I don't think it matters how many. What's wrong with my petals is I was inconsistant with the number of bullion wraps, so they are not equal size. I then switched to the three smaller versions. I did count wraps. They look askew, but really they are even and could lie flat if I pressed them or tacked them down; I preferred to let them have their more dimensional look.
I got bored with the basic flower, so I surrounded the second large wheel with two rows of flat-lying but curving bullions. Then I worked the bullion "rose" between the 2 large flowers. I began with a French knot and used different threads and colors for the petals. I made bullion clusters next.
Looking at the goofy flowers stitched "naked" onto a piece of cloth, I decided I needed some kind of coordinating element. This is what happens when one doesn't plan ahead and design first. I added stems and leaves. I'm sorry, I have to laugh, and it's perfectly okay for you to join me. The first flower looks like it's wearing a hat (It's getting close to Derby time here), and the other big flower sprouted wings and looks more like shield backed by crossed spears. Seriously, what's wrong here is no focal point! Seriously-er, what's wrong with me? The challenge does not call for a finished piece of art; no more than the exercise of practicing a new stitch on a doodle cloth is required. Forgive me. I type with tongue in cheek.
The hand dyed (be me!) gauze drape is a nice touch, yes? I have to brag that the silk perle and ribbon are also hand dyed from my red cabbage experiment. I forgot to say the cotton perles used for the flowers were all #5 DMC and the rest is Watercolours.
So what's with the business to the left? Well, it may or may not be a preview of next week's TAST. I had in mind to try partial buttonhole wheels as a seam treatment. I hand stitched on a piece of blueberry dyed linen with the idea that I might continue the colorway next week. I might -- or not.
Tuesday, March 30, 2010
TAST 2019 - Knotted Buttonhole Stitch
Wednesday, March 24, 2010
TAST 2010 - BEADED HEDEBO EDGE
Saturday, March 13, 2010
TAST 2010 - KNOTTED LOOP STITCH
The knotted loop stitch is fun to work and offers far more possibilities than what I've stitched here. Be sure to see the border and stacked examples Sharon B shows on her Pin Tangle website along with the tutorial on how to do this stitch. Basically it is two straight stitches, upper and lower, combined with a knot
My background is a piece of craft felt with metallic threads that I've dyed and then overdyed with rust. My fish (silk & wool yarn) shows the usual center placement of the knot. So does the centipede to the right.
The fun thing is the knot can follow a curved line beautifully, yet the line can appear more to the top or bottom depended on the length of of stitch above and below, as with the bottom centipede. It creates a kind of spine. I managed a small spiral, and tried to make concentric circles. With the "fossil" in the upper left, I tried to skew the stitches every which way. Even though I varied the length and spacing of the straight stitches, the "spine" is still evident, just not as knobby. Incidentally the other threads used on the sampler are a gold perle cotton and Caron Watercolours and Wildflowers in the same colorway.
Do look at Sharon's samples. She shows a thick and thin border , filler possibilities, and flowers! There is a Take a Stitch Tuesday group on Flickr if you'd like to see amazing work by global participants.
Tuesday, March 09, 2010
TAST 2 - DIAMOND STITCH
Thursday, May 14, 2009
Stitch Explore 09 - April: Casalguidi
Here is my effort at Casalguidi. It is just a sampling of some of the raised and pulled stitches. I enjoyed these and will probably add more. I went to a linen fabric for the pulled work, and it was a refreshing change from the red, white and blue on gray I had been using. Here, too, is proof that I do use a hoop on occasion.I'm not certain, but the fabric may be Dublin. I began the long, meandering line by couching down a cotton yarn. I satin stitched over it with #8 perle, then did the over stitching with Caron Watercolours. Then I made more lines with buttonhole bars and detached buttonhole. I used plain buttonhole to stay stitch consistent and for flat contrast. I worked a few bullion knots because they were mentioned and because they are such fun to do. ;-)
For the pulled stitches I used #12 perle and worked part of the pattern provided in Carol's pulled stitch tutorial. From her whitework lessons I tried, I'm not sure how successfully, to make faggots with a #5 perle. These showed up better than the stitches done with #12. I think #8 or #10 would have been better choices; I didn't have any on hand but a few that would color clash.
You realize the above is just doodling. I'm sure there are many ways to vary these stitches . The whole time I was thinking how I might distort or make the stitches irregular, so I have some ideas I'll save for another playtime session.
Friday, February 27, 2009
SPIRAL TRELLIS - February Stitch Exploration 09

A & B are built up too high before decreasing, and the stitching lines aren't flowing. In B in used a chain stitch foundation, an I idea I read about on Elizabeth M's blog Quieter Moments. Elizabeth thoroughly researches stitches and is gracious to share her experiments. Trust me, Elizabeth can find the ultimate innovations possible in a stitch, and not only that, her needlework is supurb. Back to the doodle rag, my use of the chain ( I later learned from Elizabeth she used a reverse chain) was so I could add embellishing stitches to fancy up the dimensional heart. I was thinking of a lacy valentine. I forget what I had in mind adding a second row of backstitching around C. When I remember, I'll get back to it. I did make a heart, but it's sloppy . For D, I switched to a #3 pearl hoping it would help me see the knots and bars better. You can see it didn't work for me. I had a sloppy lacy top (I wasn't going for "lacy"), I lost the heart outline, and I still couldn't wrangle those knots into flowing lines. Didn't get better with E when I returned to #5 pearl.

Here is a continuation of the sampler I began last month. My designs are a little large to cover up the linty cloth underneath. I stitched a number of figures and ripped them all out , even though one of them was quite interesting. I wanted to see if I made an s-line into a snaky shape, could I build it up to create a third dimension. Answer, absolutely! Unfortunately it was weird looking. After building up the sides and finally drawing them together in a single line of knots, I had a leech! I would have saved it as a curiosity on my sampler had I not realized I needled in all the way around instead of needling out.
While the cloth still held together I went where I should have in the first place -- to a circle. I'm glad I went with the overlapping circle design because it gave me the opportunity to try for variation. I began with the navy circle and finally got the lines to spiral nicely. If I'd stuffed it, it would be a dome, but I let mine peak slightly so it actually resembles a Chinese hat. The light blue area is actually a partial circle, but I was still able to achieve the swirl by ending at one side and bringing the thread up again at the beginning. The partially eclipsed circle with the stripes was constructed exactly like the light blue one.
You can see I finally got a heart filled in. I'm not completely happy with the way the swirling knots come together in the center, but it's a start. On the other hand, I am very pleased with my 4-color spiral.
Wednesday, May 28, 2008
A NAME I CALL MYSELF - TIFC May
The May challenge concept is a question I ponder all the time. What do I call myself when trying to explain my creative endeavors? When I tried to work through The Artist's Way , polite arguments in my head erupted into battle. Considering myself an artist won out for the time being, but that word itself is inadequate to describe the scope of activity in which I engage.
Let me explain my interpretation of both concept and palette for this month's challenge. In a nutshell, I'd resort to looking in a crystal ball to find a suitable name for what I do.


+of+scan.jpg)