About Me

Showing posts with label embellishment. Show all posts

Wednesday, May 28, 2008

A NAME I CALL MYSELF - TIFC May

The May challenge concept is a question I ponder all the time. What do I call myself when trying to explain my creative endeavors? When I tried to work through The Artist's Way , polite arguments in my head erupted into battle. Considering myself an artist won out for the time being, but that word itself is inadequate to describe the scope of activity in which I engage.

I invisibly wince when an outsider responds, "Oh, you do crafts!". My body reacts with an inward cringe if they add, "Me, too!" My inner snob and judgemental self silently separate that crafter from me and my artistic values. For me the difference has to do with creating from within, compulsive self expression, following a whim or instinct rather than a pattern. For me the barrier has nothing to do with technical proficiency or aesthetic appeal. My TIFC above, albeit an exercise, is a piece of art because it is a piece of me. It's not pretty, doesn't show proficiency, but it's not intended for anyone but me.

Let me explain my interpretation of both concept and palette for this month's challenge. In a nutshell, I'd resort to looking in a crystal ball to find a suitable name for what I do.


a. needle artist

b. fiber artist

c. textile artist

d. mixed media artist

e. all of the above

f. none of the above

g. some of each

Most of my artistic pursuits involve thread or fiber, some kind of needle or hook. For sake of convenience I generally tell people I'm a fiber artist, leaving them to presume I spin and weave (I don't -- yet) and no inclination that I bead. I have no commercial goals; I keep or gift everything I make. I love to learn new techniques and share what I learn. I have fun. All the time. And to those of you reading this, you will understand why I call myself

FIBERDABBLER. I don't know that there is an answer to the May concept question. Dare I suggest it doesn't matter semantically how others perceive us? I'm evolving, and I love the mystery of not knowing what comes next.

Monday, February 25, 2008

TAKE IT FURTHER CHALLENGE - FEBRUARY


Given the choice of basing design on a memory (my earliest being when dirt was formed) or designated palette, I chose the latter:Hmm, is that gray or slate blue? What's that dark color? Indigo? Purply blue? Again I worked entirely from stash. The two pieces of ivory satin that resemble vanilla caramel swirl (yum!) are from a piece of white silk/poly blend that I rust dyed. The teeny, tiny rust colored silk at the bottom left is dupioni. Why isn't there more? I could fib and say I was conserving a favorite fabric, but the truth is I miscalculated with the stitch, flip, cut technique. The slate piece is a piece of ultrasuede, the dark blue (with a tinge of purple) is moire, the print is from a gentleman's tie. The remaining three portions are light blue charmeuse. Confused? The upper right is overlayed with a blue sheer that has been machine stitched to resemble punch needlework, and if you look closely you can see it is printed to look like hand painted , concentric curves. It's from a lot of embellished sheer sales samples I caught on eBay!


This a work in progress picture I took, cropped and printed out to give me a clearer idea of my borderlines and guide me toward envisualizing embellishment placement and scale. At this stage that center seam treatment is looking pretty gimongous and my other stitching too dainty -- and puny. I continued adding and subtracting until I think I have it where I want it, although I may yet do a little tweaking.

Sunday, January 13, 2008

TAKE IT FURTHER CHALLENGE

First, if you haven't heard of the Take It Further Challenge, you should check the link. It is Sharon Boggan's 2008 challenge, and I have just started on January, along with 293 other registered participants. I'm going for the color palette:

As soon as I saw it I was reminded of a sweater I've admired for awhile. I've drooled over the picture and pattern so often, it looks like my copy of Knitter's Magazine, Spring, 2000, has been left in the rain. The colorway is not exactly the same, but similar with the play of greens and purples. What looks like grays & blues in the picture is really sage and teal . This is the Mitered Mozart, designed by Candace Eisner Strick, and believe me, I would have made it by now if only I could wear a short cropped garment. I searched the Ravelry site and found a beautiful example. I saw the sweater the summer of that year made up and displayed in a yarn store; the main color chosen was a royal blue, best I can remember.


Another thing familiar about Sharon's palette are the mint green and what I know as medium leaf or jungle green. The two almost seem at odds, the mint being cool and the leaf much warmer with yellow, and it bothered the heck out of me when we had our house painted a few years back (the trims were supposed to be medium and light leaf). In time I've either gotten used to the contrast or the sun has mellowed the mint to light leaf and now appears the identical color to the lichen on our trees. Such is my peripheral view out the window when seated at the computer.

To start the challenge, I gathered up my paint color cards and attempted to match the given palette. I have an abnormally large number of greens because I'm always questing that elusive silvery green of... Well, it wasn't long before I was waxing nostalgic and singing my college alma mater in my head:

"Where the Truckee's snow fed waters fall from mountain's crest,

Where the mountains meet the sagebrush by the sun caressed,

Cradled by the silver mountains neath the western blue..."


Oh, it got worse. I started searching for sagebrush on Flickr and found these wonderful pix.

I hope you'll take a minute or two and take a peek, especially if you're intrigued with the purple and green palette or just great photography:


Next I copied Sharon's palette into my Paint accessory and used the eye dropper tool to pick up the individual colors. I tried to play with a design, but best I could do was see how the colors could interact. Now if you'd like to see the real magic worked by someone savvy with a sophisticated application, Francoise's blog Creatilfun is pretty amazing.


Now for my favorite part of any project, picking through stash. Mind, I still had no clear picture of what I might make with the palette, but I found plenty in my CQ fabric pieces, thread assortments and beads to provide plenty of latitude. At last I opted to do a small, do-able CQ piece and wrestled with the ideas of using delinquent TAST stitches and even combining that with my even more backlogged BJP. Crazy quilting is the format; we'll just have to wait and see what develops beyond that.


Right off the bat I found my verifying fabric, that's the one that contains the entire palette so I know everything can work together. It was a small square of batik. In the interest of keeping the project simple and do-able within a couple of weeks, I did minimal piecing.
I began with the green dupioni and placed it right sides up together with the lavender satin (I think hand painted by Karen South) and cut a gentle curving line. Next I put right sides together and machine stitched matching hills & valleys. My plan was to repeat the procedure with the next pairing, the purple and yellow-green dupionis. Unfortunately I forgot to allow sufficient width to allow for a second seam. Waste not! I seamed what I had and left the curved edges raw and overlapping the outer edges of the starter pair. Not wanting to repeat the mistake I simply straight seamed the end colors, on the left a silk velvet, on the right a crinkle-textured irridescent that flashes yellow and lavender. Too bad you can't see the latter; it's a piece I received in a squishy and it has the most marvelous handpainted flower that I'm reserving for another use.
Once the strips were sewn I fused a medium light, nonwoven interfacing to the back.
I have started the seam treatments, dealing with the raw edged pieces first. My intention is to use embellishment for "curving" the straight seams.

Monday, December 24, 2007

A VERY SPECIAL HEALING DOLL


This is the last of the three healing dolls from Mai-Liis Peacock's online class from Joggles. For me it is the most special because of what I experienced during her construction. It's very personal, so I'll share the story at the end in case you'd prefer to skip it.

Mai-Liis patterned this doll form to accomodate a fabric image of the Virgin of Guadalupe as a means of teaching us the image transfer process. Since I happened to have that particular fabric, I simply fused it to a background of similar color, then planned the rest of the doll. I loved the idea of following up with a Hispanic theme using bright, jubilant colors, opulant texture, and ornamental detail just shy of overkill , yet preserving the reverence and dignity of a traditional style. Neither Catholic or Hispanic, I in no way wanted to create a mockery, but I realized religious festivals throughout Latin America are celebretory, an occasion like the Day of the Dead is an excellent example. Still I would need to select the recipient carefully.

Actually I'm gifting this doll to two persons. I will give it to a friend who recently and unexpectedly lost her daughter to cancer and who herself has since been diagnosed with lymphoma. It is my wish that she will someday pass the doll on to Hope, her granddaughter, the little girl adopted from Guatemala by the deceased. In the detail here you can see two of the charms I selected as milagros. The angel represents Hope's mother. I hope my friend will take comfort from the Blessed Mother's posture of prayer and loving expression.


Some additional notes on this upper portion of the doll. The crown or halo is comprised of 3 shell sequins stitched with seed beads. I embroidered the roses with 2 mm silk ribbon and scattered more seed beads among them and using another for the jewel at her collar. I stitched a chain with gold thread to "attach" the charms. These charms were pewter. I used some really old and dried out Treasure Gold on the angel. I realized my entire collection of Treasure Gold colors was dried up. When my attempts at microwaving didn't work, I contacted the company and was told a few drops of Xylene (on which the products are based and available at hardware stores) should soften it up. The hope charm didn't fare as well with the Treasure Gold, so I painted it with the same gold Lumiere I used to seal the edges of Our Lady's veil, a piece of silk chiffon hand dyed in an earlier experiment with an acid dye. I then varnished the charms. The raw edge at the end of the fused fabric bothered me , too abrupt a change. The tri-colored ric-rac seemed to do the trick.


An essential healing stone for this doll was an undrilled chunk of obsidian purportedly mined at the location of the incident from which the story of Apache Tears evolved and is reputed to be a powerful agent to ease grief. A pouch was needed to hold one the larger stones and others collected for their healing and protective benefits. Hung over the pouch (made from velvet ribbon and stitched closed with decorative embroidery) are four additional symbols I deem essential to healing and living: love, courage, balance and faith. I used a strand of beads to girdle the figure and frame the pouch.

I made the cloak from silk velvet and used bright confetti fringe. Although this is a doll that particularly addresses grief, I wanted the overall effect to be light, not somber, and hopefully bring a smile to the beholder. I used Stef Francis silk floss for the simple chain stitching and help blend the multicolor of the background fabric and the fringe. I debated a closure for the cape, but opted to use none. Instead I just tacked it together at the neckline and let it hang from the doll's neck.

A remarkable thing occurred as the doll (whom I began thinking of as La Senora) neared completion. I became aware that the grief I was holding since the death of my own daughter two years ago was lifted. I can now talk about her without tears, and today, the anniversary of her passing, I will visit her grave for the first time since the funeral. I know that once I knew the purpose of the doll I was happy when I worked on her. I thought a lot about the grieving process and hoped the comfort I was starting to feel would be played forward through the doll.
I should also mention that when I purified the stones for this doll, I cleansed a piece of the same obsidian for myself. It sat next to me the entire time I fashioned the doll.


Here are my three dolls together, ready to go to their new homes. The Diva looks like she's inviting everyone to love life and celebrate diversity. December 26, 2007


Wednesday, November 28, 2007

HEALING DIVA


My second doll for Mais-Liis' healing doll class. She was so persnickity during the construction process, I decided she was a diva, demanding and opinionated. She has a mind of her own, and she wanted me to know it. I allowed her to have her way, which, in the end, is probably a positive thing, for as outrageous as she turned out, she has enough sass and brass to make a believer of any skeptic. She needs to be a take charge doll, as her recipient suffers from lupus.


I like the mask concept -- good because none of the faces I had on hand seemed to fit -- so I chose a sun ; it goes well with the fabric I actually picked for my third doll. I try to use glue sparingly, but it couldn't be avoided since there was no other way to apply the sun. It's a little too small, but I justified it as a mask which wouldn't cover the entire face. Well, it's on to stay, and Diva Dearie is stuck with it. By the way she bewailed the fact that my photos are truly terrible (hence you can't see how well the gold of the sun works with the other gold embellishments), but I drew the line at taking her to a professional portrait studio.

Next came the hair. I envisioned a feather headdress and crocheted a "wig" with feather yarn
(the color is Phoenix!). Diva Dearest said it looked like a bad coonskin cap and insisted I cut off the long braid which was to have doubled as a boa. Some compromise is good. Then she got into the stash I was auditioning for Doll #3 and had to have the gold trim I purchased in CA and was hoarding for a project with a decided Hispanic flair. After throwing a tantrum in my head, she prevailed. What to put the braid on? My thought was a poncho. She demanded a kimono.
Some compromise is good. I did pick the fabric; it's wool that I fulled (felted) from a thrift store skirt. The trim turned out to be stiff and very fragile, and hand stitching was not an option. I used glue, but it seems to exaggerate the stiffness. I wasn't able to machine stitch either , sigh, because DD was already wearing the fitted (showing off her tiny waist) garment I'd best describe as a hapi pullover with obi.

DD's dainty, reversible brass hands were flopping like flippers. I stabilized them by beading bracelets. Called for something around the neck. I thought beads from the bracelets could be stitched around the opening. Oh no, DD wants something grander, an Egyptian style collar, for goodness sakes. I think it's excessive, but she's the gal who's going to wear it. I think I was able to tone it down some using bugle beads the same color as the background.


The remaining dressings went easily and surprisingly without confrontation. The healing stones are nestled in silk satin inside a pouch I crocheted with gold elastic. I embellished it more heavily than I might have otherwise, but my hope was to counterbalance the top heaviness. The bow and eye bead got off center from the back of the obi. I couldn't correct it without ruining the trim -- and I certainly wasn't going to waste another inch of it! DD pooh-poohed the idea of a headband, but I convinced her some ornamentation was needed to interrupt the explosion of hair. I couldn't come up with a means of fastening hair sticks from which to dangle baubles. Instead I made a bead cluster with three gold leaves and a cloisonne butterfly charm. To complete Her Glitziness, I loosely wrapped her with 2 kinds of gold thread.

Thursday, September 20, 2007

MY SUMMER VACATION - Part 2

Arriving first at my father's home in the Bay Area, I'd've thought there'd be no trouble finding a computer for downloading the TAST stitching assignments. First stop in my quest the local library. Closed! What library is closed on a weekday??? Still early, I drive to the next library, a main library, and I should be early enough to find a parking space on the square surrounding it.
Hah! Circling the third time, I notice all the people waiting for the doors to open. All the people turn out to be teenagers. I'm thinking summer programs. I think again, "They're there to swoop down on the computers!"

Yellow pages give no promise of cyber cafes or nearby places for renting computer time. I'd call a friend, but I don't have any still in town. If I knew any of Dad's neighbors, I'd be knocking on doors. I briefly consider ringing random doorbells. Thankfully common sense prevailed over my increasing anxiety. Does anybody ever suffer withdrawal from homework? Finally, in the deepest, darkest, post-midnight hours of my despair, the answer comes: senior center!!!
Early morning finds me there (it's within walking distance!) delighted to find an entire room filled with computers. Apart from engagement in intriguing conversation with other users, I was easily able to print out 3 weeks of stitches.

Sorry to say, I never got back to the Bay Area until time to fly home. Typically during the summer, I'd get to Tahoe maybe once a week for shopping and errands. It's only a 10 mile drive, but involves a boat trip to a public landing with limited parking just to get to the car. Factor in windy weather and my limited stamina for getting up and down the granite steep to our cabin... I made my way to the South Tahoe Senior Center once, but the two computers there were occupied. I didn't bother with the library since it was still vacation time.

I savored the time to work on the stitches I had and also the beaded journal pages. When not absorbed in those activities I was reading. Thanks to my LED book light, I can read whenever insomnia strikes. I finished at least a dozen books, including several historical perspectives of
Native Americans. Obviously this was on my mind while working on this piece:

What could be more appropriate for this sampler than Arrowhead Stitch! I used that predominately along with Sheaf Stitch in cotton and silk floss and perles. The teepees I created with ink stained Tyvek leftover from "Rock Island". As I folded and manipulated the Tyvek, I thought about the early Lakotah women assembling their lodges and dismantling them again when the tribe changed encampment. The color of the Tyvek fabric seemed just right for the buffalo hide covers. The entry flap of the right teepee is open to show the interior blackened by smoke from the lodge fire and a little piece of fuzzy yarn is supposed to be the buffalo robe used for sleeping. Eagles, big horn sheep, elk, grizzly bears and trout were at one time prevalent in all our western mountains. Native peoples wintering there would have made their way to the plains for seasonal buffalo hunting. Having had to fell two small lodgepole pines this summer, I have new regard for those long, straight teepee poles that had to be dragged from camp to camp.

Go Fly a Kite! Why not kites, colorful, simple or fancy?
My kites always seemed to land in trees; still kites evoke for me images of happiness.
July
Seed, Delica and buglebeads embroidered on moire. The focal point is a vintage, design under glass cabochon from Germany. The floral called for a formal look, so my effort an attempt at scrolling lines with different golds and irridescence for a Baroque look . I tried not to clutter the background and let the flowers come to fore. Colors here are not accurate. Background fabric is a creamy ivory, and the golds are much warmer than appear here. The darker beads are more purple but with definite gold flash.

Saturday, April 28, 2007

LA PINATA: TAST 15-17

April 10 I was just short of apoplexy. I thought for a thankfully brief
while I might have to choose whether to download TAST 15 materials or catch my flight to CA. I had already packed an activity bag with supplies I'd need. I even prepped an 8 x 7 inch piece of Aida cloth I'd dyed by tacking down a gnarl of dye batch waste thread into a center oblique S-curve. I placed some of my dyed gauze and rug canvas roughly on the other diagonal and stitched that down, too. I was ready for whatever stitch Sharon B might send our way. It turned out to be the Oyster Stitch.

Good that I had time and beautiful space for stitching, as I had to do a lot of practice betwixt doodlecloth and project fabric. Even then I didn't quite get the knack so my oysters look mutant -- plump with texture, I'd like to think, however incorrect they may be. In a setting like the above, who minds frogging? I had a balcony with table and chairs. In addition to poolside, there were two lovely garden patios where I could choose to work in sun or shade. Gurgling fountains refreshed and soothed to the point not quite right oyster stitching could become palatable. And although magaritas are helpful, they can only aid digestion so far. I got tired of oysters and just started filling in with other stitches until I could access TAST 16 , which I did compliments of the hotel lobby computer.

Ahh, the Palestrina! More knots for texture. I've mentioned before that I often work spontaneously. This is not to say I stitch away with random abandon; I am mindful of basic design principles, and although the composition may be abstract and asymmetrical, it still requires attention to overall balance. I consider this with the placement of color, type of stitch and direction. The only thing definite about my sampler at this point is a colorway and specific stitches I want to use. If I'm lucky the piece will eventually suggest a form; in this case it wanted to become a bird so I began to create general shape -- just enough to give a hint of birdlike form. As a kid my favorite puzzles were the find the hidden object kind; freeform affords me an opportunity to share such a challenge with viewers. For myself as viewer, I prefer to look beyond the visually obvious and seek the intent, technique and methodology of the artist. I firmly believe appreciation of anything involves contemplating "the good, the bad and the ugly".
Did you experience the return of Quetzaquatl or the uncloaking of a Klingon warship? Can you sense a bird from the Painted Desert, a butterfly, or just a jumble of colored threads? In the cloth my bird is rather shaggy and made me think more of a pinata decorated with colorful crepe paper. At the very least you'll surely agree with me that it represents something festive from south of the border.

I'm getting another inkling from the sampler. Hmm, it wants to live on as a large handbag -- or tote. Obviously it's familiar with my stash collection of southwestern and Hispanic fabrics. I may have to re-do my running stitch border from TAST 17 . Add a little bling, maybe.

Monday, April 02, 2007

MUSTANG MOON

TAST 13: KNOTTED CRETAN STITCH

I try to explore new fabric techniques and surface treatments as I make these TAST samplers. I use a small format, no particular size, just random pieces , that gives me just enough space to do something with in a week's time. These are not intended as major projects, just mini samplers for study, so if something turns out not to my liking or an experiment fizzles, I haven't invested too much in time and materials. I mention this because as you look closely, you'll see I was so fabric frugal, I used the selvedge. I loved this dye batch from a couple of weeks ago, and there was no way I was going to sacrifice even part of the large pieces of quilters' cotton for the sake of experimentation in the name of fiber arts and science.

What you see here as the background is about a 4 x 4 inch scrap of buckram thrown in with the dyable melange. Now, were it not for Sharon B's class in stitch development, I would never ever have dreamed of trying to stitch on stiff ol' buckram. But you know what? After scouring and dyeing, it has substance without stiffness and is a pleasure to stitch. Meanwhile back in the lab, I played with Angelina fiber for the first time. I scrunched some pale aqua cheesecloth where I wanted to use the Angelina. I laid a few wisps under the gauze, and a little more on top. In manipulating the mesh, I thought I saw a horse, a spectre of one maybe... Ok, ok, dark fabric, must be night, need a moon... I once applied a flat back jewel like a shisha with cretan stitch. Could I do it again with knotted cretan? Reaching for an acrylic gem, I spy something shiny the same color. Already on my work table for another project is a package of equine confetti (it'd be horsey sequins, but there are no holes) I spotted among the party supplies for upcoming Derby. So what if they don't have holes, I'll bond them down with the Angelina! It worked, but I'd use less next time. I placed some violet tulle over (a local store that specializes in Derby hats sells 6 inch tulle in a myriad of colors, purchasable by the yard for 35 cents, or by the roll between $6 - $9; I splurged on 2 yard pieces of all my favorite hues), pinned it down and chain stitched the edges.

I opted not to add much detail to the big horse; I wanted to let the fabric suggest the form. I thought stitching over the mane and tail areas added enough definition. With a needle I coaxed a few strands of gauze out from under the netting. It's a time consuming effort, and would make allowances for this if I ever want little tufts peeking out. You should be able to see little wisps between the ears, here and there along the mane and tail. I added a few scattered beads to fill gaps in the night sky, and probably overdid those on the moonbeams. I added one more horse to the surface; it too is of a different color, but it matches the fuschia moon.

Thursday, March 29, 2007

WHEN THINGS GET UGLY, ROC ON!

You don't have to be nice. It's perfectly all right to express your distaste. I did for days. I thought I had a good design plan. I had a nice assortment of novelty yarns that, believe it or not, co-ordinate quite well together. And the ground fabric is not that dirty, fulled camel I've been working of late; it's nice wool suiting I found in my yardage stash. The piece just wasn't speaking to me. Ugly was getting uglier by the stitch.


What a disappointment. The visual properties of the individual yarns are completely lost, and there's an obvious disparity in scale. I think I blew it from the beginning with the big, fat chenille. It was one of three yarns I used to create a spiral. Geez, you can't even see the other two yarns -- and no, they not that feathery stuff. The more I tried to add to detract from the chenille centered blob, the worse it became until I reached the point I decided I'd had a good practice (I couched with feather, cretan, herringbone, knotted and up & down buttonhole, etc) and would simply skip the TAST 12 show and tell.


I felt bad about that decision; it didn't seem right to publish okay stuff and omit the less successful ventures. So I changed my mind and took a new look -- you may know how I am about turning things around to gain a new perspective. I went to work again trying to "make it work". I didn't. But despite a total design failure, I had a delightful time couching away and inventing absurd interpretations in my head. And on the positive side, I suppose I did achieve lumpy, bumpy density of texture.
BETWEEN A ROC AND A HARD PLACE

Princess Leia has trouble with Tribbles during a close encounter with a roc chick/pet roc/third or fourth roc from the sun in an anomalous breach of that time-space continuum thingy in a dimension far, far away...

"She's lost it this time!" I can hear the chorus, "Beam her up, Scotty!"

Monday, March 05, 2007

CROSS REFERENCE and TAST-Y FISH

I'd better explain. With last week's cross stitch posting Sharon suggested we check out Jean Draper's online workshop "Pattern Making with Cross Stitch". The sampler at right is what I concocted. It is done entirely in cross stitch and variation.

In a former life, the background was a wool skirt that I machine felted (fulled). I really like camel color, but this one was drab and desperately needed color. My
predominant thread is Carons Watercolours "Fiesta", which by itself, didn't give me the brightness I wanted, so I added accents in red with a silk/wool yarn for needlework.

I started with some loose burlap patches. I cut and fringed and trimmed until I was satisfied with the shapes and stitched them down. The threads removed to make fringe fell like pick up sticks. I figured that's how they wanted to be so I stitched them in place. I also made a bundle of threads. The light burlap was too prominant. I added two pieces of homespun. It was about that time I was working with daylight and realized my green was actually teal (I really need to remember to use my Ott Light). I added a patch of flimsy turquoise and teal homespun and scrunched and distressed it. Next came fillers in the form of couched yarns (that squiggly one in the center is really a dark teal, and it's kinked because I unraveled a scrumble I didn't like), beads and more stitching. I decided I was done but needed closure .

I usually work without a hoop, but this time I did, and the project stayed in the hoop two or three days leaving the telltale rings. I could have pressed them out, but I hate to waste perfectly good guidelines, and I thought the design needed something to define that it was complete. And so entered my mind the encircling cross stitches. Meantime I remembered that I'd thrown a bunch of toothpicks into my dye pots (I've got great blue and purple and green and fuschia and yellow gold toothpicks; they don't come so colorful commercially, and now I have bragging rights to hand dyed embellishments that strangely resemble canape picks). Anyway, I criss-crossed to create a base, then criss-crossed with seed and wooden beads. I made the motifs before stitching the border. Were I to do it again, I'd lay down the border stitches first, then my circle would be unbroken.

My felt was irregular in shape. With a little stretch of the imagination it could almost be a hide.
I think I'll make it happen. I'd also like to distress the edges a bit. Maybe I'll play with the 24 needle felting tool I got yesterday, but it looks so wicked...


I think I started this in the PLS class where the idea was to cover with dense stitching. I just kept adding to it. Lots of Cretan, Fly & Feather Stitches and French knots. The first fish revealed itself in negative space, so I decided to bring him out a little more, but still hiding in his habitat.

Saturday, February 24, 2007

SUPER FLY -- stitch for TAST 8

This piece of linen began as something else, so I have one row on this sampler that is not fly stitch. It is the curving line of greenish backstitch woven with two colors of purl loops. Everything else is composed of fly stitch and variations, which I added in rows, not planning ahead. In other words, it was a dull exercise; even the colors were bland, and my hearts were upside down. Maybe I was just feeling off because we had just learned that our beloved teacher Sharon Boggan was ill and would require surgery.


I think silliness took hold with the beaded flies which reminded me of bird tracks. At this point I started having fun. I decided to turn this TAST sampler into a get well card. I stitched "Speedy Recovery" using only fly and the occasional straight stitch. I stitched it freehand, and it looked it. But I could go back later and do it right. Meantime I decided to try stick figures after playing around with a motif that used a combination of plaited and reverse fly stitch. I liked the look of these petroglyph styled characters (that may, however, be an alien in the center) and decided they should be raising their arms in joy, exhuberant with get well wishes -- they should be dancing! A hunting dance! They're going to track some giant, now extinct, flightless bird, and I'm going to leave my grafitti in naive form. Somewhere along the way I flipped the sampler, so my hearts are right side up. Originally they were there just because they could be. Now, of course, they represent our love reaching out to Sharon . I'm declaring the motif on the left side to be a mandala of healing. It is so ancient, part of it is buried. Corner flora symbolize medicinal plants. It's a shame my example of closed fly stitch is obscured by fronds.


I think I'll let the linen fringe beyond the deliberately rough border stitching. I may let the bird take a step or two out of bounds on the right. I'm happy. I'm optimistic about Sharon's recovery. I 'm even pleased with the colors now. I hope I've left the viewer with a hint of the

primitive expression I'm so fond of.

Saturday, February 17, 2007

TAST - FEATHER STITCH

Feather stitch, oh feather stitch. How do I love thee? Let me count the ways -- or try to.

A feather stitch by any other name would still tickle -- not to mention give me endless delight. I do love this stitch. It can meander all over the place, it can be light and delicate or substantive. It looks beautiful on its own but also begs for embellishment in myriad ways. Did I play? Oh yes. Here's what I tried going from left to right:

Column 1 - 3 rows of feather stitch

I started smaller at the top and let the stitches elongate as I worked down. Then I turned fabric 180 (upside down) and worked the same way in reverse, larger to smaller. Had I worked the stitches in precise counts there probably would have been a pattern, but I liked the irregular look and thought it might have abstract or freeform potential. I turned the fabric 90 degrees to the right, then worked from left to right, connecting to ends from the second pass. I kept the "C" stitches in line to create a boundary from the next column group. What I really, really liked was the negative spaces that formed from the distorted stitches. It struck me as something organic, the look of something growing unexpectedly and with abandon.

Those incredibly shaped spaces begged for filling. I was going to leave them blank to better show off the experiment, but compromised and did a few so I could try different effects. My inclination was to go for a crazy patchwork and using different colors and textures to differentiate the segments. These are my fillers from top to bottom: 1) woven silk ribbon; 2) cross stitch in #8 pearl; 3) satin stitch in #5 pearl; 4) twisted bugle beads with Delicas; 5)beadpoint with #8 seed beads; 6) horizontal straight stitches in #5 pearl; 6) beadpoint with #8 seeds in a raku-like matte finish to counter the irridescence of the other bead section. I randomly placed a few Delicas and seeds on the tips of the conventional feather stitches.

By the way, I tried some other things with this area, but wanted more variety. I used straight stitches vertically, horizontally and diagonally, first with a single strand of floss in a light color, then darker. It didn't do much. Next I worked the straight stitches in a bright, #8 pearl as seen in the finished (6) above. I liked this a lot; I saw patchwork without the outlines of the spaces obscured. I worked the basic stitches in Caron Watercolours (1 strand), so I thought it might be better to use several shades for the straight lines. That worked well, too. Still I'm pleased with the variations in texture I started, and I like the way the conventional stitches gradually give way to the freeform.

Column 2 - single row of feathered up and down buttonhole

I suppose feathered feather stitch would be redundant. I added extra feathers . I like this effect for pine needle clusters or bamboo leaves. I worked them in 2 strands of silk floss. I like them best left as was, but I had to add a lighter accent because that area looked too dark. I wove a single strand of rayon floss and added French knots.

Column 3 - single row of beaded feather stitch

Since we're practicing stitches, I thought I might practice the bead embroidery too. I worked half up, half down. Embeadery by Margaret Ball was my resource. She gave several methods for the feather stitch. The one I chose turned out to be fairly easy and fast and kept the stitches flat for the most part. A method I'll save for when I want to build up more dimension has the bead strings crossing.

Column 4 -feathered up and down buttonhole

I went for a dainty look with 2 strands of silk floss and some small beads.

Column 5 - mirrored featherstitching with fillers

Left row is done with rayon ribbon shadowed with 2 strands of silk floss. The right side has a base of wool/silk yarn, overstitched with this incredibly smooth and slinky thread I found in New Zealand. It's just called Glitter Cord.

Can you handle another surprise? I took one look at the spaces between the two rows and saw hearts!!! Look closely, there are two large hearts and one small heart in the middle. It was a freak accident, but one I'll want to remember. The smaller one resulted from my habitual disregard for counting on these samplers. Note, I went from a series of 3 stitches to 2 in the middle.

I attempted to place Rhodes hearts in the centers, but all those feather points got in the way. My mettalic cord hearts are a bit misshapen, but they fill the space as do those little straight stitch crosses.

Column 6 - 2 rows single feather stitch

I like to use pearl for this stitch. I think I used #8 or #10. The body of the thread allows for a slight curve at the end when the "feather" is angled. When paired as opposites a diagonal space is formed. With this combination there are many, many possibilities for embellishment. I opted to keep it simple in this treatment , as the columns to either side are so strong.

Column 7 - 2 rows feather stitch joined

Same principle as Column 1, except I went from longer to shorter and kept the consistently spaced (I counted!). What a difference. These are also stitched with Caron Watercolours. I used rayon floss (2 strands) for the French knots and #8 seed beads in the center. If I'd had the right beads I might have gone for color gradation to work with the subtle change in stitch link.

Monday, February 12, 2007

PAISLEY to TAST


My latest doodle sampler. No matter which way you look at it, it's a bit strange, but there's an explanation. This was to be my final lesson effort for Sharon B's Developing a Personal Library of Stitches class. It was going to be a heavily stitched piece, and according to my "sketch", was to be a profusion of paisleys. My scribble indicated where the paisley "eyes" would be. I basted buttons where I wanted approximate my focal points and started going for the multi stitch/color/texture of the central line. My "vision" was to have the entire cloth similarly covered. Time ran out.
I was several weeks late getting started with the TAST/Take a Stitch Tuesday challenge, so I used the unfinished sampler to work the requisite stitches. This is the result through herringbone. I'm calling it finished and will go on with mini-samplers for individual stitches, as I have other projects to work on.

Monday, February 05, 2007

Recent News

I've returned from another trip west. On the flight out I had fun chatting with the woman in front of me who also had knitting in hand. I did finish the front for my sweater while I was out there, but not having the back with me, I couldn't complete the project. I since have and will post a picture shortly.

I see TAST has begun with a flourish. There's even a ring and a Flickr group. I'm looking forward to getting settled in with the challenge. I have doodled all stitches to date, but what I hope to start doing is creating a mini sampler each week. And of course I want to refine and complete the ones I did in conjunction with Sharon's online Joggles class, Developing a Personal Library of Stitches.

When I first checked my email I found a thread about Stash Guilt in full discussion mode on one of my e-lists. Right after that I received a link to the latest edition of http://knitty.com/ISSUEwinter06/FEATcollection.html
and one of the best and therapeutically funniest articles I have ever read relevant to stash. I applaud author Kate Antonova , and encourage everyone to read it, for even though she speaks of a yarn collection it could be a stash by any other name. I see it as a miracle regimen for SGS (Stash Guilt Syndrome). This article is so liberating I think I'll stitch an homage to The Stashbuilders' Creed, shamefully adapted by me from the Ferengi Rules of Acquisition:

#10 -Greed is eternal!
#242 -More (stash) is good; all is better.
#97 -Enough (stash) is never enough.
#6 -Never allow family to stand in the way of opportunity (for stash acquisition)!!

Another Knitty article well worth sharing is Cheating at Color Theory by Julie Theaker. It promises a foolproof method for determining color value.

Monday, November 27, 2006

FLOWER POWER -- EEEEEEK! RUN!

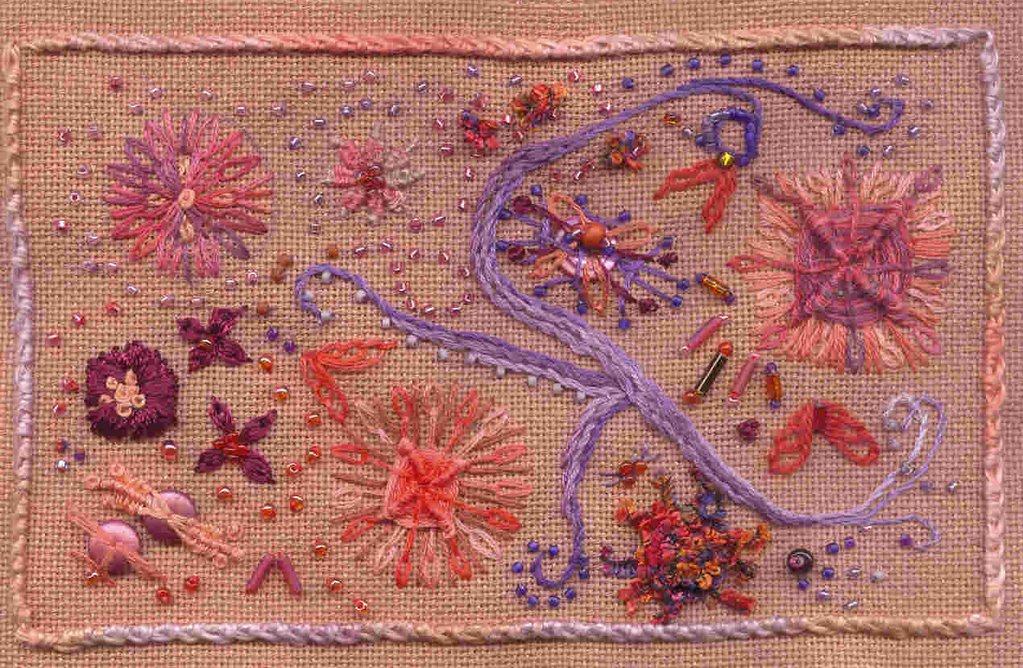
Run fast! Run for your lives! A lilac creature is in pursuit of my flowers. Looks like a flower child had a bad trip. I should call this "Why I never dropped acid!" Oops. Sorry. The picture should be oriented this way:


On the other hand, this way looks just as chaotic and just about as scary. I could call it "Nightmare at Haight-Ashbury. This is a sampler I started during week 2 of Sharon's class, the lesson about point. I started with the 3 butterflies -- geesh, can you even find them? Then I wanted to practice some different flower techniques. Imagine my surprise when the first turned out like a gods-eye (more flashback: tie died tees, macrame...). I tried to disguise it with more petals, and the shape got away from me. Added some straight stitches to give it more body, and there you have it, the square flower, a horticultural miracle. Perhaps I shouldn't say, but I actually liked its tranformation as a primitive weaving.

One of the other big flowers is rather tribal-looking, too. I would have been happier had the center been more round, but I realize the number of spokes plays a major role. I skipped the weaving on the the third large flower , then continued playing with the wrapped and woven thread technique on the smaller flowers. I especially liked the star flower with the woven petals, and I liked the boucle effect produced by less than consistent wraps around individual threads in the upper right hand corner. I was ravaged by guilt working this technique, knowing I have 13 more woven and wrapped motifs still to do for my Options in Hardanger class.

I have no idea why I kept going at the sampler, except I wanted to see where the point concept would bring me. In the back of my mind I envisioned seed beaded paths interspersed in barer areas with cascades of tiny buttons and bead assortments. While I love the practicality of the postcard size sampler, it can be creatively limiting -- no wait, I forgot about the purple doodle that ran rampant and morphed into an oversized K (my married surname? Granddaughters Kaitlyn and Kellye? My grandmother Kathryn aka Kay?) and hogged at least a third of working space.

Why did I keep going? Well, we are supposed to be exploring and experimenting. I just wanted to see if I could pull off a visually balanced piece. My conclusion is there is too much clutter and lack of unity. The stitching did not have my full attention and it definitely shows. Still it was a fun exercise in which I could relax and do whatever. Another plus for the postcard format.

And just so you know, while I was born and raised in the San Francisco Bay Area, I was too young to be a Beatnik and too old to be a Hippie.

Thursday, November 16, 2006

Sharon B's Stitches Class


I'm behind in my blogging since Sharon's class started 2 weeks ago. I've been having too much fun doing the homework! We are compiling a personal library of stitches, whereby we study the components of a stitch and explore the possibilites of usage : entire, in part or in combination with other stitches. Considering the different fibers available, the potential of an individual stitch becomes seemingly infinite.
We are working samplers of different sizes . The first one I started is conventionally formatted, but like others, I'm also opting for postcard sized samplers where I can explore more randomly.
We are starting on linens and evenweaves but will be experimenting with other fabrics like felt and buckram .
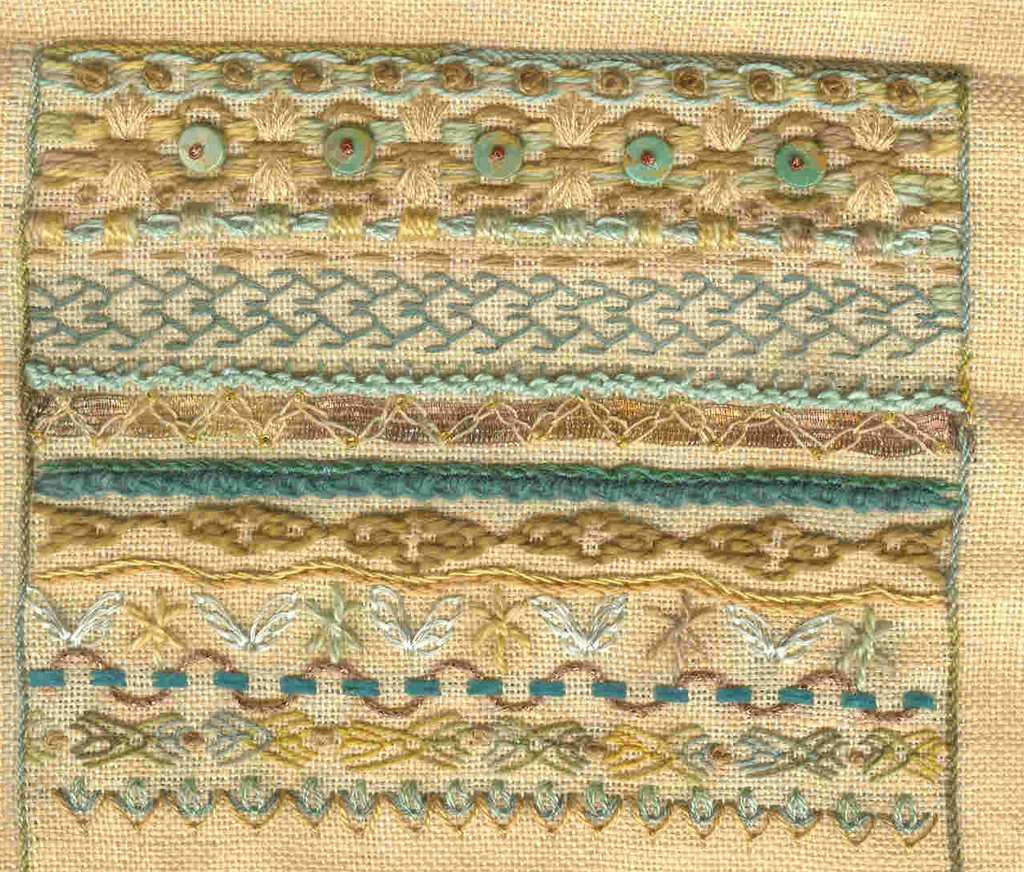
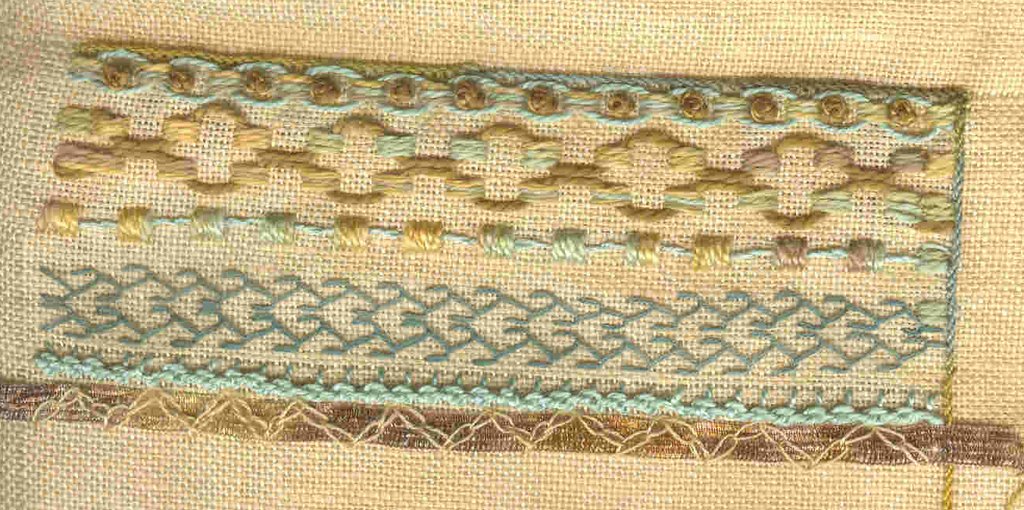
Above is my sampler at the end of Lessons One and Two. I will be refining some stitches later, and I'm saving beadwork and filler stitches for last. Here are the descriptions of the stitches and fibers used to date.
Week One
25 ct Dublin linen
border: stem stitch in Wildflowers
band 1: guilloche (Wildflower posts, #8 pearl weaving, #5 Fr. knots)
band 2: first row running stitch posts in Watercolours, 2nd row satin stitch postswoven threads ( #5 pearl cotton)
band 3 vertical, satin stitched posts , Portugese stem between posts (2 strands cotton floss)
band 4 mirrored fly stitch (2 strands Waterlilies)
band 5 line of Basque knots (#8 pearl cotton)band 6 variegated rayon/acetate ribbon yarn couched with 2-chain zig-zag (single strand silk floss)
Filler stitches and beading will be added later.

Week Two
I added a few beads to Week 1, but won't add more until I've finished the stitching. I also re-did the Portuguese stem stitch between the posts in band 3.
Week 2 begins with the heavy teal band midway :
band 1: Portuguese stem stitch in 2 strands of cotton floss followed by second row of the same stitch in a wool tweed yarn.
band 2: double fly stitch mirrored and linked in #5 pearl
band 3: stem stitch, first in #12 pearl, then in #8 or 10
band 4: triple chain "butterflies" in rayon floss alternating with knotted cross stitch "stars" in Watercolours
band 5: 2 rows of running stitch in velvet cord, laced with a sparkly cabled cotton yarn.
band 6: triple fly stitch variation in Wildflowers, French knots in hemp yarn.
band7: tulip stitch, chains in silk floss, woven V's in Waterlilies. Fly stitches repeating below V's in #10 pearl.

Wednesday, May 31, 2006

FIESTA DEL CHARRO


FIESTA DEL CHARRO, originally uploaded by Fiberdabbler.

This is a completed round robin block I previously called Fiesta!, and if you follow the link you'll see the collaboration of 6 other stitchers. It would have been a beautiful block left at that; I intended merely to add a charm or two and finish up a couple of naked seams. Obviously encrustation lessons from Sharon Boggin took hold, and although I tried to balance busy spots with a few sparse ones, I may only have succeeded in gilding another lily. I do like to think the work of my talented fellow players stands on it's own, my finishing touches secondary. My only changes to previous work was to reposition a button and a charm, and regretably had to redo ole, which was originally rendered in a very pretty variegated thread.

Sunday, May 21, 2006

La Vida Laredo


La Vida Laredo, originally uploaded by Fiberdabbler.

When I first decided to try crazy quilting I had zero stash: no fabric, no threads or fibers, no beads, ribbons or embellishments of any kind. One of my first acquisitions was a wonderful fabric assortment from Karen South. The woven stripe you see in two of my patches caught my imagination right away, and from the first I knew I would someday use it in a Mexican theme, and over the next years I gathered embellishments suitable for such a project. A while back
I hosted a Southwestern swap followed by a round robin. The desert landscape fabric is one I contributed to the swap, but my most prized goodie from that exchange was the geometric patterned fabric that I immediately interpreted as a stylized desert landscape. And the colors! So close to my equally prized "serape" fabric! Instant color palette!

For the round robin I pieced two southwestern blocks, this one which I called Desert Sunrise (or was it Sunset?) and another in a completely different colorway I called Fiesta. It was the latter which circulated through the round robin and to which I am presently adding finishing touches. Desert Sunrise/Sunset I kept. I'd decided it would be one of two blocks that would represent a bit of family history. When I find the stash I set aside for it, I'll piece the companion; meanwhile Desert Sunwhatever has morphed into La Vida Laredo and represents the years my paternal grandfather lived there with his first bride (I descend from his second wife). Strictly according to family lore, she was from a wealthy family in Nuevo Leon, grand or greatgrandaughter of one of the original Spanish land grantees. In the pictures I have seen, she is a beautiful young woman, elegantly attired. One of the photographs was taken in Paris, where she may have been a student. Tragically she died young in childbirth in 1911. I've often wondered how they met.

I placed symbols on the block to represent my grandfather. There is the initial S for the surname we share, a button representing the railroad for which he was a conductor, and another button in the shape of a miniature Winchester rifle bullet to suggest his reputation as a fine hunter. There are two stars, one to symbolize his Texas birthplace, another tributes his special appointment to the Texas Rangers.

Saturday, April 15, 2006

lt's finished!!!


finished block, originally uploaded by Fiberdabbler.

At last my block for Sharon B's Encrusted Crazy Quilting class is complete! I enjoyed every stitch of the adventure and look forward to Sharon's next course offering. I learned a new approach to embellishing a block; instead of completely embellishing one patch before moving on, we were encouraged to think ahead and work on the whole in specific stages. I think this keeps our focus on the entire block and helps us work toward a creative goal. Another thing that falls in place with this method is
unity, better balance of line, color and motifs, all the while maintaining paths for the eye to meander along.

Please take a look at the 4 detail shots that follow and feel free to comment or ask questions.

detail1


detail1, originally uploaded by Fiberdabbler.